
| 일 | 월 | 화 | 수 | 목 | 금 | 토 |
|---|---|---|---|---|---|---|
| 1 | 2 | 3 | 4 | 5 | ||
| 6 | 7 | 8 | 9 | 10 | 11 | 12 |
| 13 | 14 | 15 | 16 | 17 | 18 | 19 |
| 20 | 21 | 22 | 23 | 24 | 25 | 26 |
| 27 | 28 | 29 | 30 |
- 메서드
- GitHub
- 컬렉션 프레임워크
- Class
- 싱글톤 패턴
- html
- 깃허브
- 클래스
- Collection Framework
- 이클립스 설치
- 자바
- Git
- 버전관리
- 깃
- Map 인터페이스
- CSS
- singlrton pattern
- Eclipse
- 오류
- 패키지
- 인터페이스
- Collection 인터페이스
- java
- 해결
- Method
- 이클립스
- Today
- Total
안루피취뽀일기
감싸진 요소에 Props(속성) 전달하기 본문
비슷한 구조의 jsx 가 많다면...
계속 반복해서 쓰기보단
컴포넌트를 분리해서 동일한 구조를 재사용하는 것이 더욱 효율적!
여기 아래 CoreConcepts.jsx와
import CoreConcept from "./CoreConcept";
import { CORE_CONCEPTS } from "../data";

export default function CoreConcepts() {
  return (
    <section id="core-concepts">
      <h2>Core Concepts</h2>
      <ul>
        {CORE_CONCEPTS.map((conceptItem) => (
          <CoreConcept key={conceptItem.title} {...conceptItem} />
        ))}
      </ul>
    </section>
  );
}
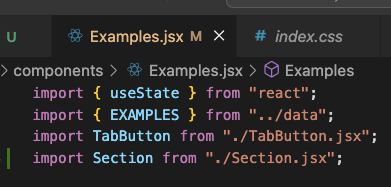
Examples.jsx는
import { useState } from "react";
import { EXAMPLES } from "../data";
import TabButton from "./TabButton.jsx";
export default function Examples() {
const [selectedTopic, setSelectedTopic] = useState();
function handleSelect(selectedButton) {
// selectedButton => 'components', 'jsx', 'props', 'state'
setSelectedTopic(selectedButton);
// console.log(selectedTopic);
}
let tabContent = <p>Please select a topic.</p>;
if (selectedTopic) {
tabContent = (
<div id="tab-content">
<h3>{EXAMPLES[selectedTopic].title}</h3>
<p>{EXAMPLES[selectedTopic].description}</p>
<pre>
<code>{EXAMPLES[selectedTopic].code}</code>
</pre>
</div>
);
}
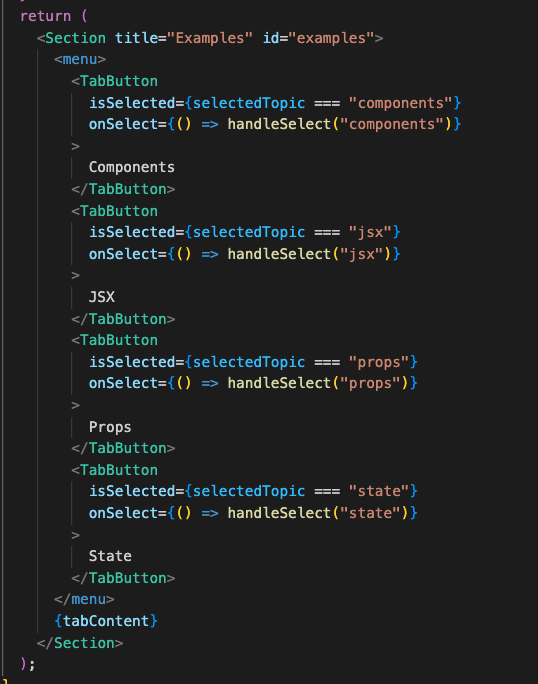
return (
<section id="examples">
<h2>Examples</h2>
<menu>
<TabButton
isSelected={selectedTopic === "components"}
onSelect={() => handleSelect("components")}
>
Components
</TabButton>
<TabButton
isSelected={selectedTopic === "jsx"}
onSelect={() => handleSelect("jsx")}
>
JSX
</TabButton>
<TabButton
isSelected={selectedTopic === "props"}
onSelect={() => handleSelect("props")}
>
Props
</TabButton>
<TabButton
isSelected={selectedTopic === "state"}
onSelect={() => handleSelect("state")}
>
State
</TabButton>
</menu>
{tabContent}
</section>
);
}
아래와 같은 구조를 하고 있다.
<section>
      <h2>제목</h2>
</section>
앱의 규모가 커지면 커질수록 더 많은 <section>을 생성하게 될 것이다.
...

그렇다면
새로운 섹션 컴포넌트를 생성해보도록 하자..!
Section.jsx를 만들어주자.
export default function Section({ title, children }) {
  return (
    <section>
      <h2>{title}</h2>
      {children}
    </section>
  );
}
그리고 이 섹션 컴포넌트를 import 해주고
여기에 <Section></Section>을 불러와 준다.
title 속성도 설정해주고
실행화면에서 확인해보니....
Aㅏ....
css가 깨져있다..!
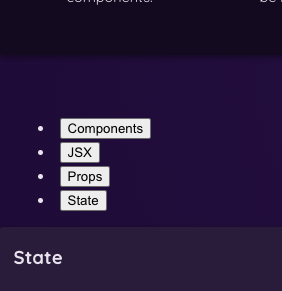

이러한 결과가 생긴 이유는 index.css 파일에서 스타일 내용을 작성할 때

섹션 컴포넌트를 적용하기 전 id(examples)가 사용되었기 때문인데
즉 이 id를 새로 설정할 때
아까 만든 커스텀 섹션 컴포넌트로 지정하였지만
섹션 컴포넌트의 id(examples) 속성을 지정하지는 않은 것이다.
prop들은 커스텀 컴포넌트에 설정할 때 자동으로 적용되거나
해당 컴포넌트 속 jsx 코드로 넘어가지 않는다!
그러므로 이 Examples.jsx 내에서 설정한 id 속성은 적용이 되지 않는 것..
props를 구조 분해 할당할 때 추가할 수 있는 특별한
내장 자바 스크립트 문법이 있다.
바로
...props
이 온점 세개는 자바 스크립트의 내장 문법이다.
(아마 배열 복사할때 써본적이 있다)
이것을 사용하면 자바 스크립트가 이 구역 컴포넌트에서 사용할 수 있는
모든 다른 props를 모아와서 props object(속성 개체)로 병합한다.
즉 하나의 자바 스크립트 객체에 props로 분류되는 모든 것이 모여서
이 Section 컴포넌트로 들어온다.
export default function Section({ title, children, ...props }) {
  return (
    <section {...props}> //{...props} 여기에서는 데이터, 즉 값의 집합을 펼쳐서 다른 요소로 보내기 위해 사용
      <h2>{title}</h2>
      {children}
    </section>
  );
}
이 패턴은 내용을 모두 감싸는 wrapper component 작성 시 유용하다!
가장 대표적인 예시가 오늘 본 section 컴포넌트인 것..!

'React' 카테고리의 다른 글
| 조건적 콘텐츠 & State(상태) 업데이트 !매우간단하지만 중요한! (0) | 2024.02.01 |
|---|---|
| [S.WITH] 3일째 해결 못하고 있는 post_no undefined오류.. (0) | 2024.02.01 |
| [React] Todo List 만들기 (0) | 2023.12.28 |
| 정리해본 전반적 흐름... (1) | 2023.12.27 |
| 백엔드 프론트엔드 연결하기! (1) | 2023.12.26 |


